Monday, September 22, 2014

I finished up my fuel tank today.

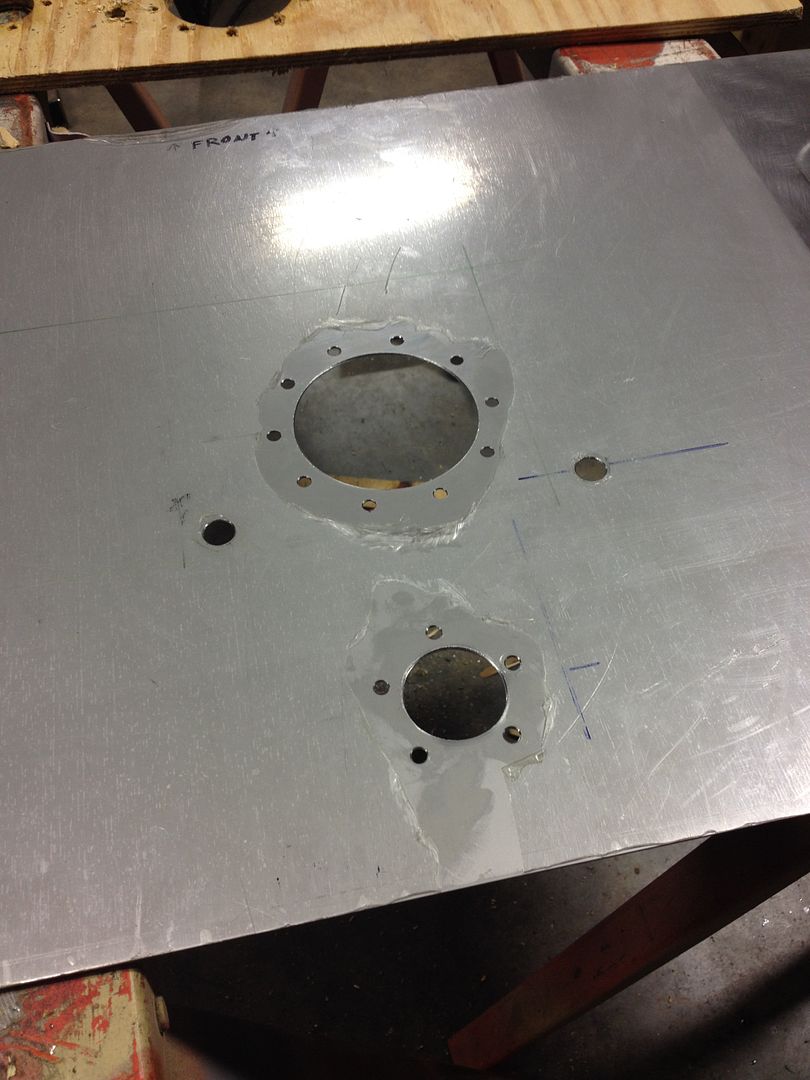
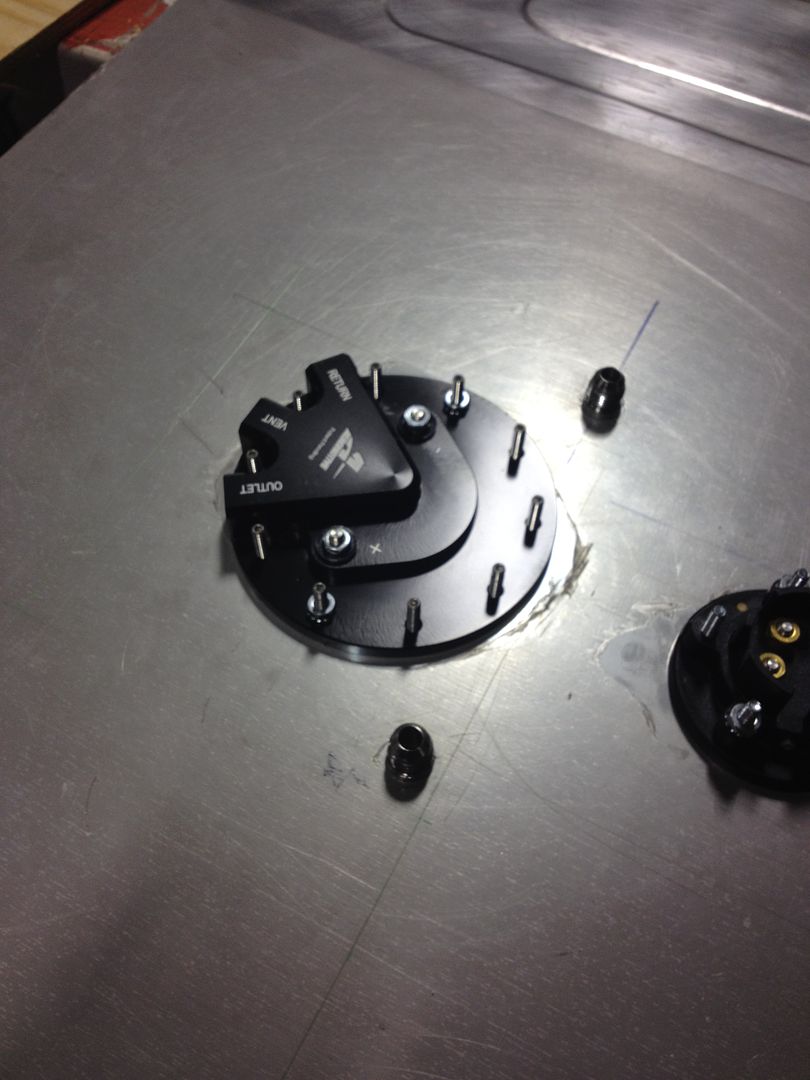
I finished bead rolling the fuel-inlet side, and drilled the holes for the fuel pump and level sensor.  I'm using an Aeromotive Phantom 200 in-tank fuel pump setup.  It's pretty deluxe, it comes with its own bulkhead which seals the supply line, vent line, return line, and power.   I'm using a JAZ 33-240 ohm level sensor.  My original setup used the factory VW pump and sensor, and I wasn't really happy with any of that.

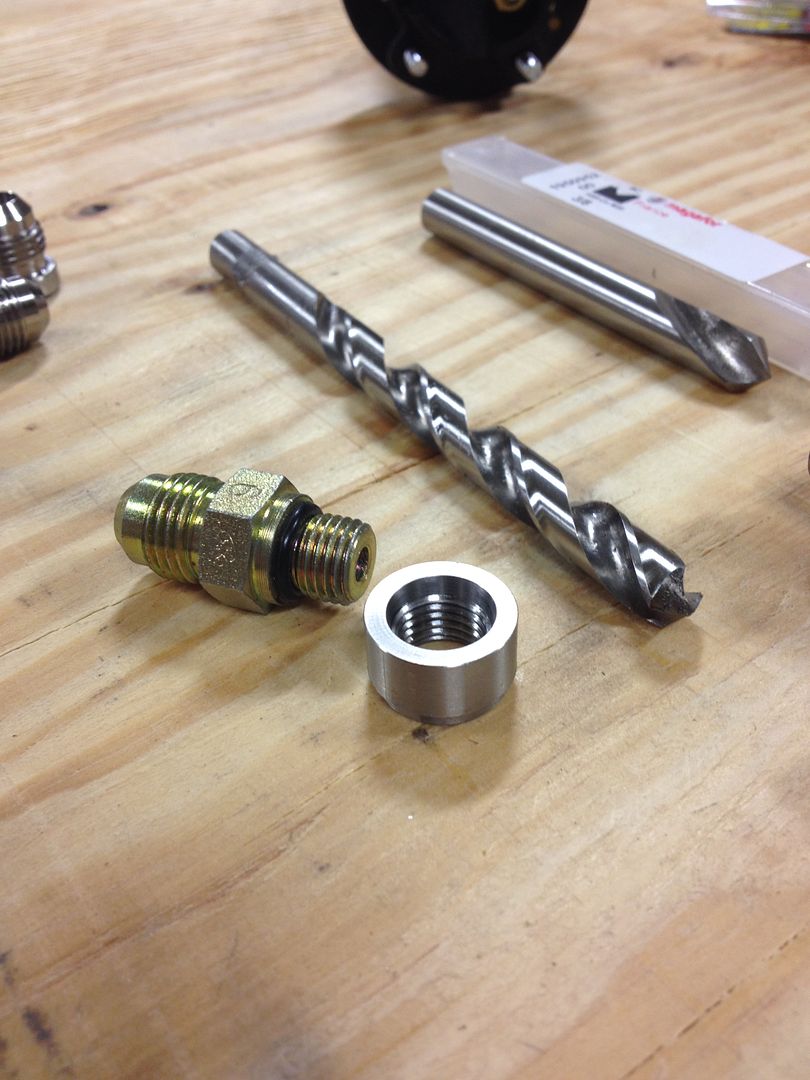
I machined a -4 O-ring boss fitting on my lathe from 304 stainless to weld into the bottom.  I didn't install a drain plug on my last tank, and regretted it when it came time to remove the tank!

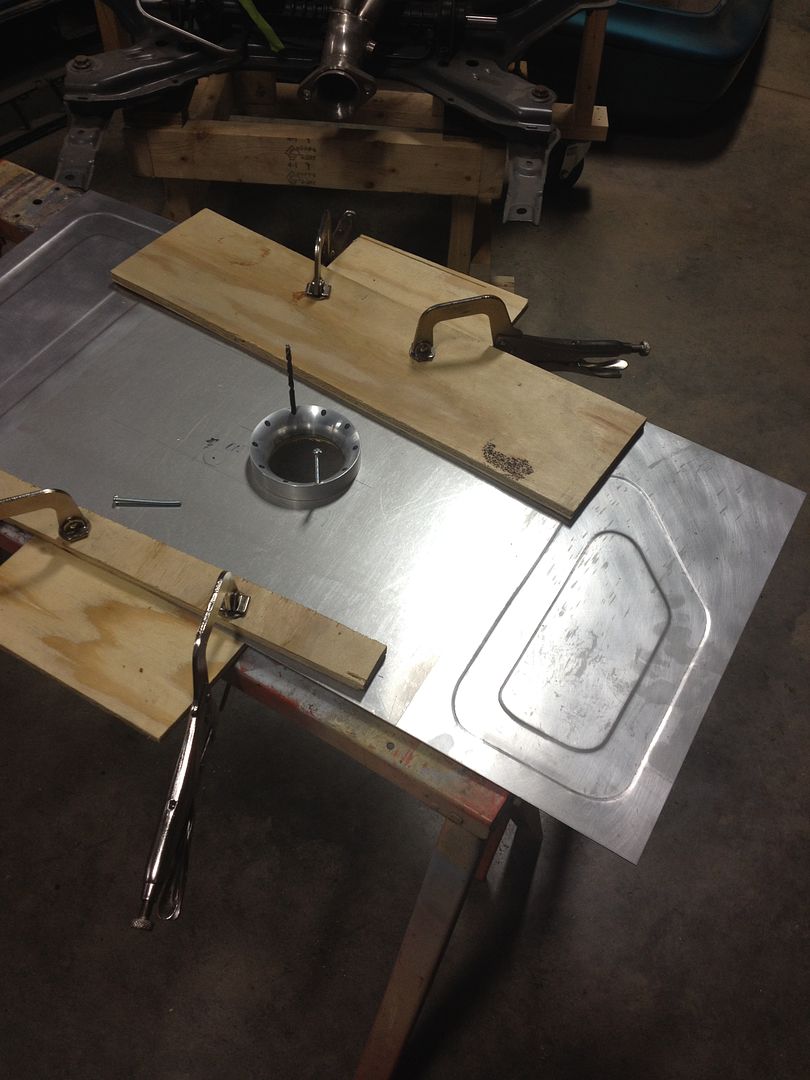
I turned a step in the top side (which will be inside the tank) to locate itself into a 5/8' diameter drilled hole.

I also turned down some -6AN male union fittings.  The union fittings were cheaper and easier to find than weld-on male stainless fittings, so I machined the back side off.  These are going to be auxiliary vents.  I might not use them, but I can easily plug them up.


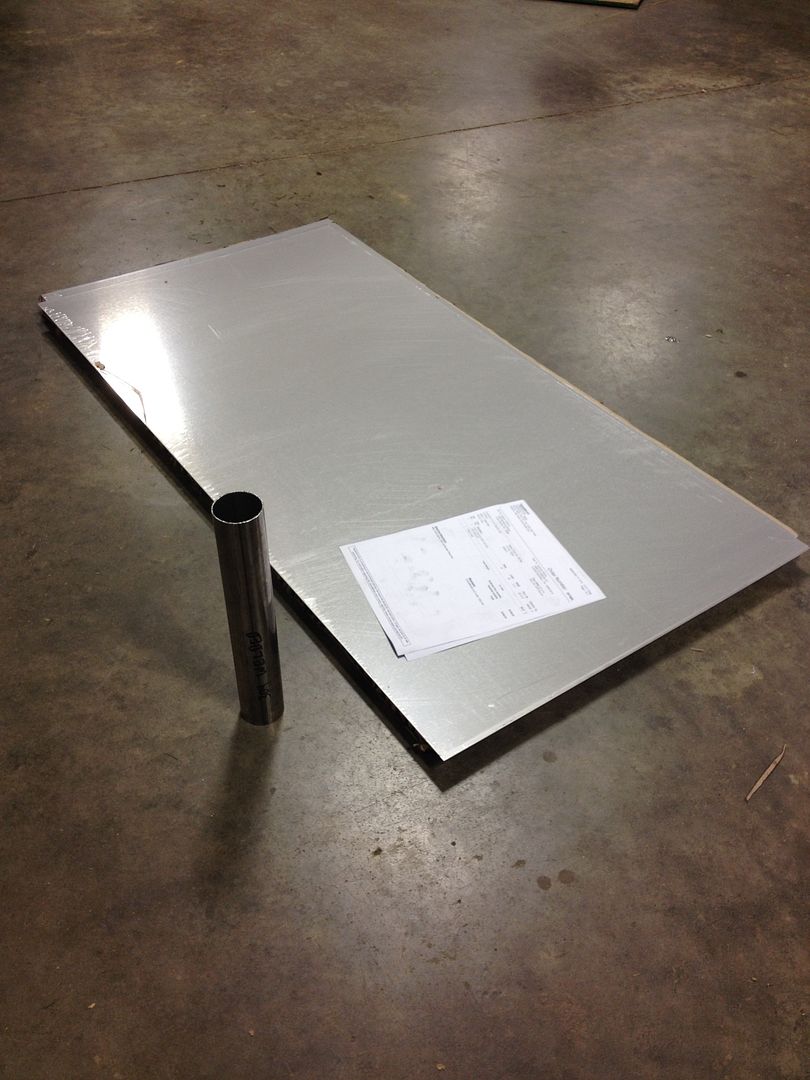
Here is the top of the tank after all of the holes were cut.  I used Lennox hole saws, which cut pretty well in the 304 stainless.


Here is the Aeromotive bulkhead fitting.  It's a pretty nice piece!

This is the JAZ level sensor I'm using.

All bent up!

After bending and fitting the bottom piece:

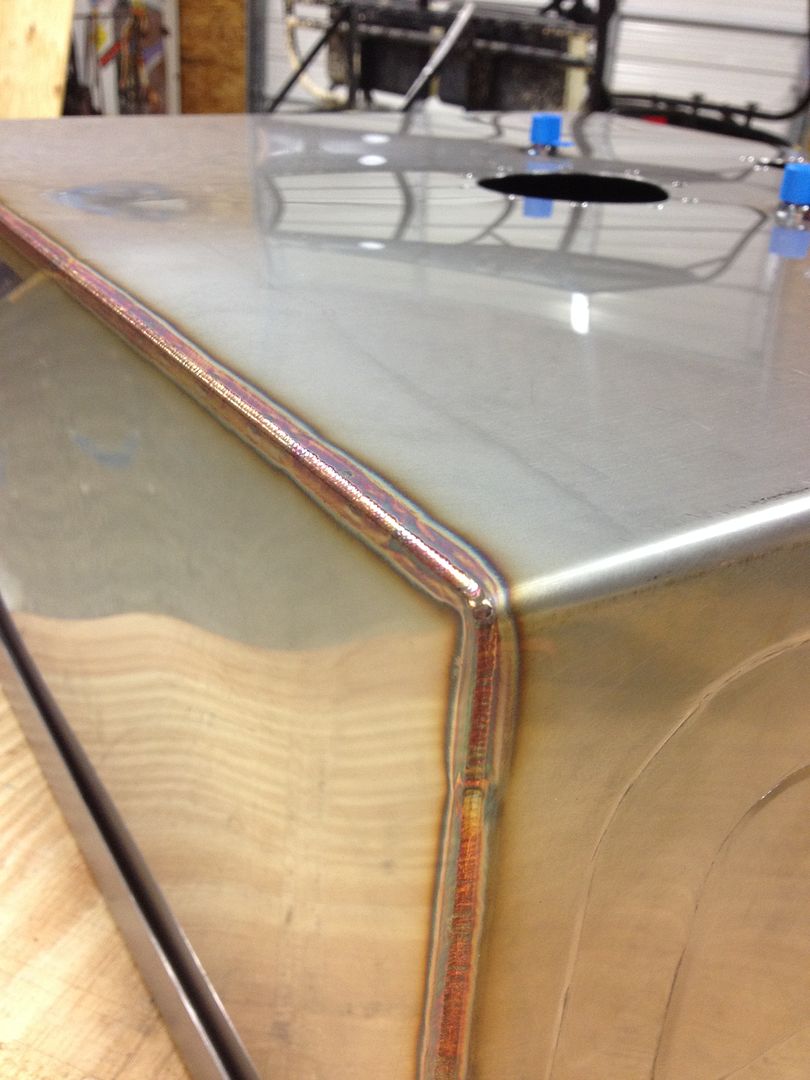
I took the tank to Bill Lewis for final welding.  I was really happy with the fit, I took my time with the layout and bends and ended up with a perfect open corner.

Tacked

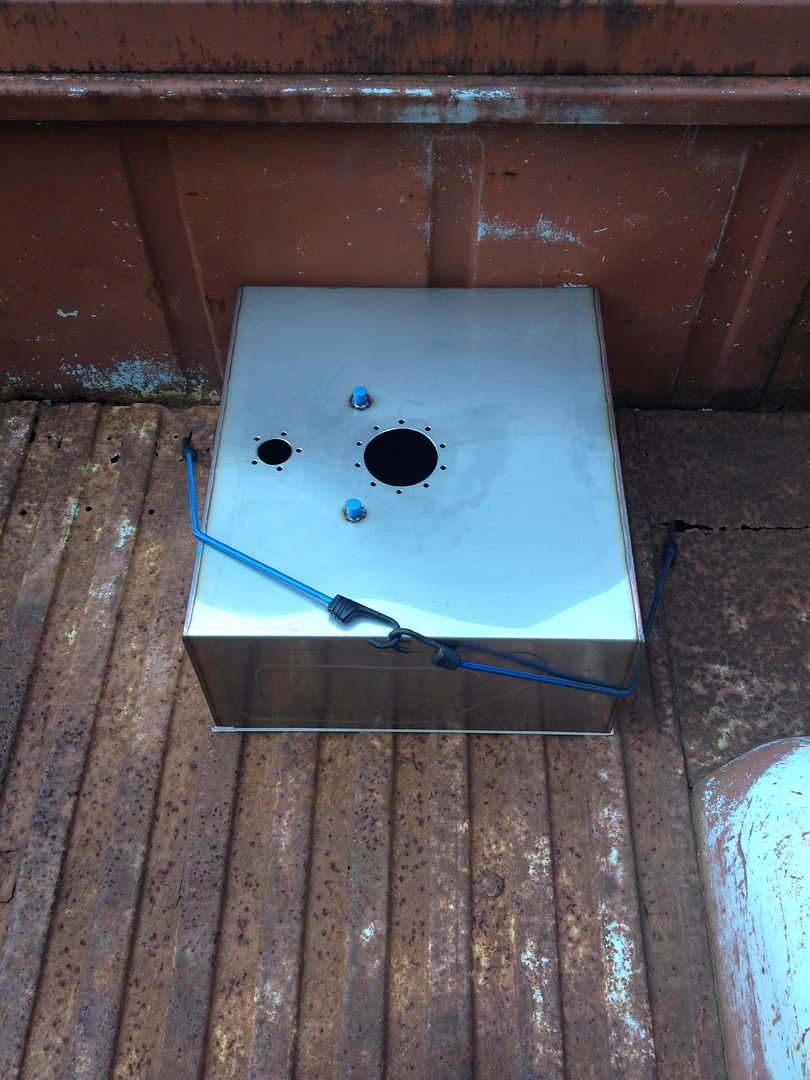
All welded!  I picked it up in my old truck.  There aren't any tie down holes in the bed, but I was able to find some!

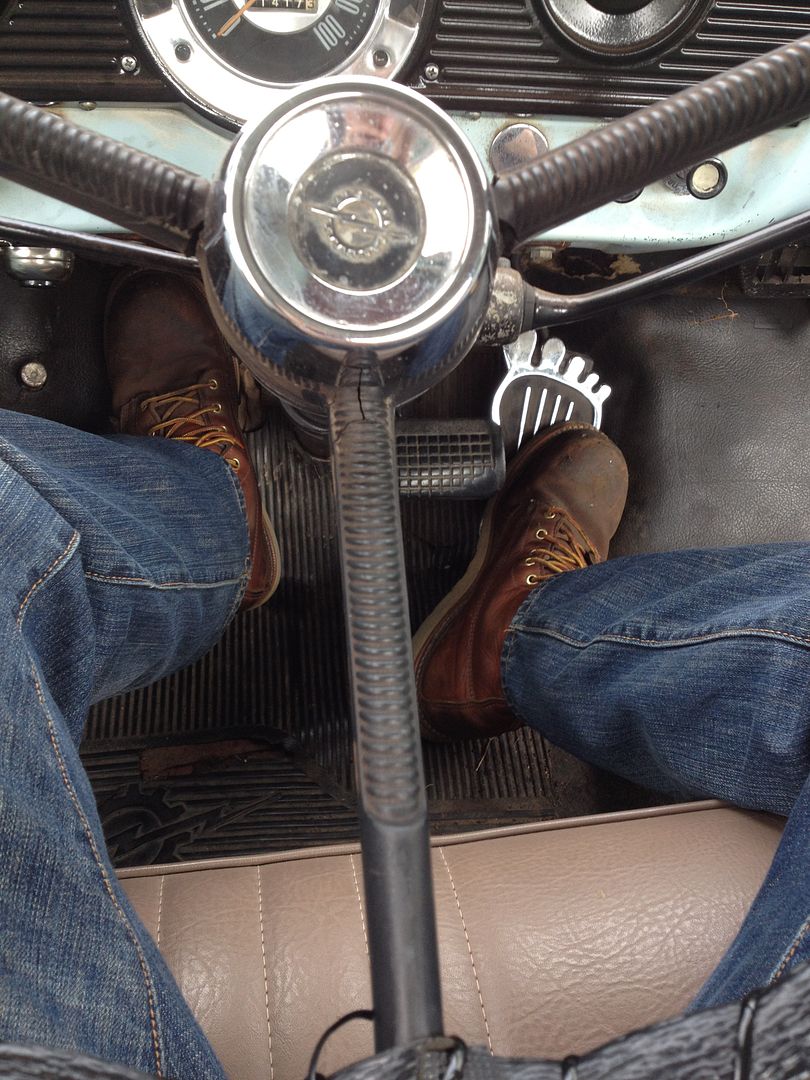
The footprint gas pedal cracks me up every time lol.

Bill really did a beautiful job on the welding.


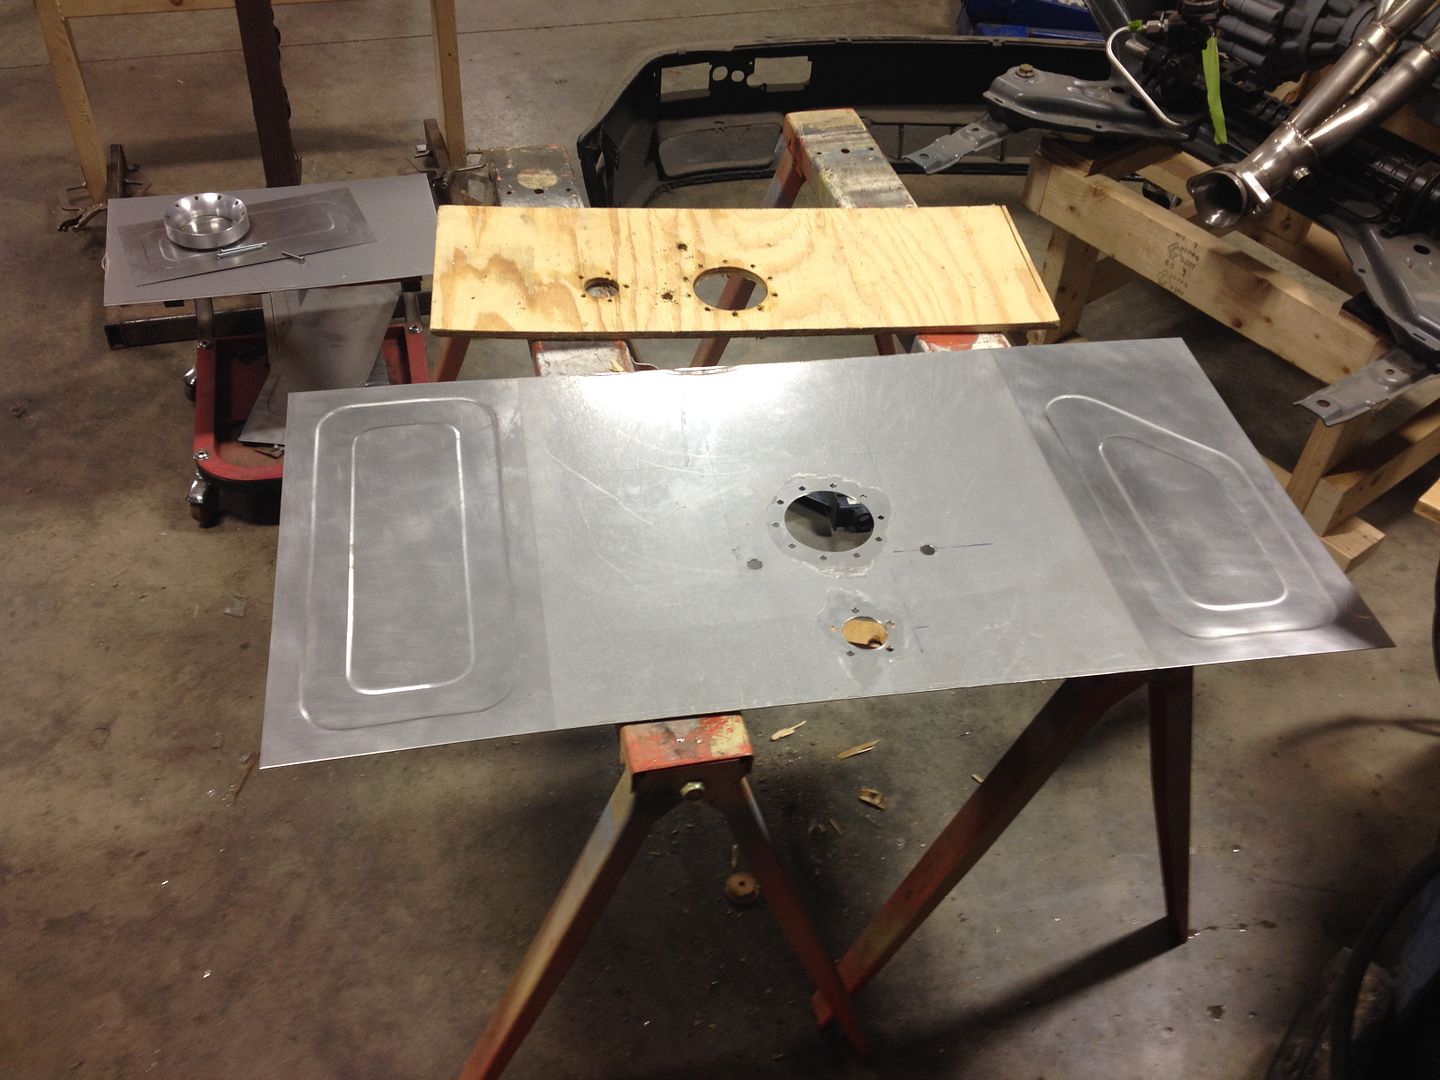
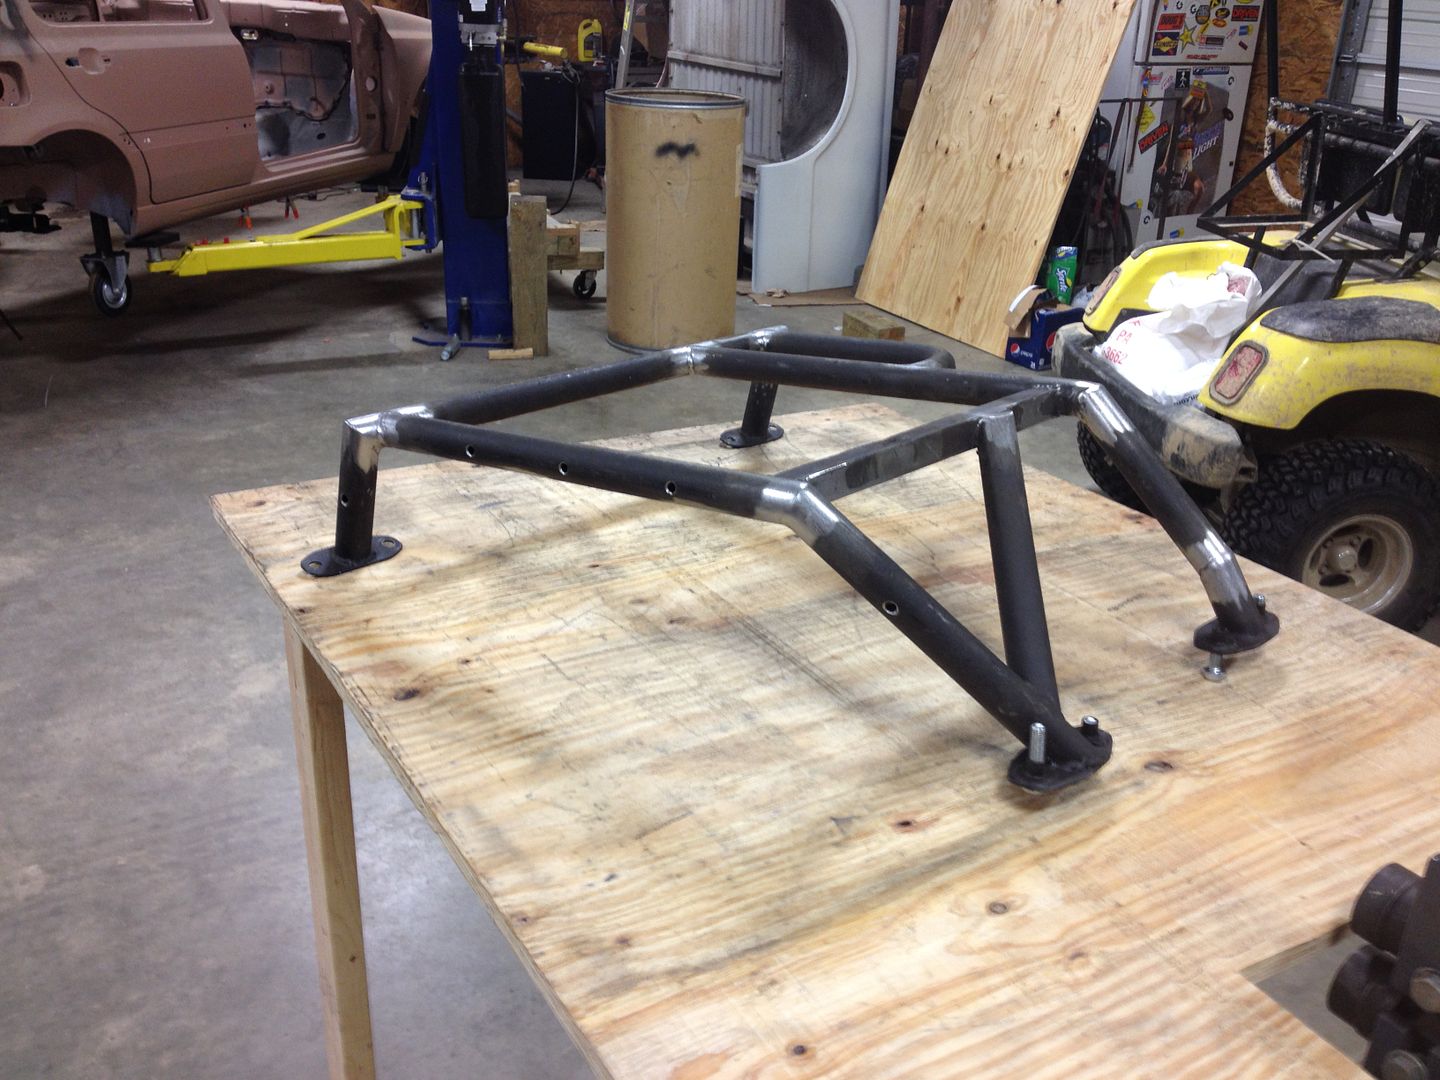
I did a lot of work on the fuel tank cradle as well.  This holds the tank up in the car, and I wasn't really happy with this piece either.

I decided to grind all of the welds... some of them were really nasty!


I still have a little more work to do, but it's getting there.

I won't mount the stainless fuel cell directly to the frame, I plan to weld a steel plate onto the frame which will fully support the bottom of the tank.   I laid it out in 20ga steel and bent everything up.  I was having a good day today with fits, I was really happy with this piece as well.  Drilling in the corner of the bend (before bending) really helped out.

All welded and ground.

Here is the finished piece.  I also bead rolled a section to add a bit of stiffness, and drilled a clearance hole for my drain plug.

Here is how the tank fits inside.  I added some curves to the flanges which match the bead rolled patterns in the sides of the tank.

Drain plug

The cradle rises a little higher in this corner.  This corner is unsupported by the frame due to subframe bolt clearance issues, so the taller flange will add a little strength.  I also plan to tie a filler neck guard into this tray, and its mounting point will weld directly to the tall section of the flange.  I also left room for foam padding all around the tank, I didn't want any metal-to-metal contact on the tank itself.

Tuesday, September 16, 2014

Tonight I started work on a new stainless steel fuel cell.  I was never quite happy with the aluminum tank I built during my suspension overhaul in 2008, so I'm taking the opportunity to rebuild it entirely.  I'm using 18ga 304 stainless steel this time, with a better in-tank pump setup (more details to follow, the pictures turned out blurry).

This is the leaky turd that I'm removing and throwing away.

Two sheets of 24" x 48" 18ga stainless from OnlineMetals.com and a piece of 2" tubing for the filler neck.

I built a wood table to go around the Harbor Freight bead roller that lives at the shop.  This allows me to roll the beads in the full sheet without having to wrestle the weight of it.

I laid out the first set of bead rolls on the outside of the tank.  This face will be covered entirely by the exhaust heat shield, so I'm essentially using it for practice.  Even if the forms aren't perfect, it will still add stiffness to the tank.

I copied the same dimensions onto the back side.  Because the throat of the bead roller isn't deep enough to swing the full sheet around, I have to roll the form in two halves - half from above, and half from below- and blend the edges.

It's not perfect, but I'm happy with the results!

I started to layout the form on the side which intersects the fuel filler neck.  I ran out of time to bend this one tonight, but I think this is the shape I want.

Again, I transferred the mirrored pattern onto the bottom of the sheet.

I will bend the rest next time!   I also have to cut a 3-1/4" diameter hole in the top for the new fuel pump, which will be fun.

Sunday, September 14, 2014

New tools!  I traded a bunch of random sockets for a set of Bahco files.  I bought the tamper resistant T60 Torx and 29mm deep impact socket from Cripe Distributing on eBay for super cheap, and found the last Craftsman Professional US-made wrench to fill my SAE set.

I now have a complete set of SAE-size wrenches for my paint cart.

I added a few more bends to my fuel lines, and cut the ends to the proper length.   I also tack welded the hydraulic line brackets onto the body.  I still have to build a bracket that holds the two bulkhead fittings and fuel filter, but otherwise my hard plumbing is done!


I made a few more line clamps, drilled some holes and installed rivnuts, and finished up the mounting for my hydraulic lines along the rear of the car.

Sunday, September 7, 2014

I picked up a few more new tools.  I found a few new-old-stock Craftsman Professional US-made wrenches in the back of the clearance rack at Sears, so I picked them up in an effort to build an SAE size set to keep in my paint cart.   I also picked up another Hansen metric socket rack.

The Hansen racks hold 6mm-20mm sockets, but I really only own (and use) 8mm-19mm in the 3/8 drive size.  So I chop them down!

I bought the Hansen rack because I bought a set of Snap-on 8mm-19mm standard 6-point sockets.  I am taking my old Craftsman set to work, and upgrading the main box.

The old Craftsmans at work

There are a few more sets I would like to pick up, but the socket drawer in my work toolbox is filling out nicely.

I also stopped at a second sears (for more old stock Craftsman Pro wrenches!) and at Harbor Freight for an SAE deep socket set to keep in my truck toolbox.  Now that I have the old Ford, I find myself needing a better emergency supply of SAE size tools rather than the metric stuff.  I also picked up some of the plastic Harbor Freight socket rails, and they're absolute trash.  The Craftsman and Wright rails are worlds better.

I got some work done on the Jetta this weekend.  I bent up some 1/8" thick 304 stainless clamps for my fuel lines, and marked them for the final trim.

Again, the jig I made to hammer these out.

In place:

I have to add two small bends to the outer lines, then flare the ends and make some bulkhead fittings, but my stainless fuel lines are just about finished up!

I started bending up the replacement tubing I received from OnlineMetals, and got the hydraulic hardlines all finished up today as well.  I have to weld two bulkhead fitting mounts into the chassis, but they're all done!

This is one of the mounts I need to weld, it's just hanging in place.

This bulkhead fitting is just under the passenger rear seat, next to the fuel filter.  The LF and RF lines are too long to bend in one shot, so they're two pieces of 8' tubing with a fitting in the center.