Sunday, October 26, 2014

I sold the old Ford this weekend.  I've decided to focus all of my attention on the Jetta, so it had to go!  It was a fun summer cruiser and I was sad to see it go, but I'll get another one someday.


Things have been heating up at the shop recently.  I've ramped up my work on the Jetta, Woody has been making good progress on his '72 GMC, and Big Woody has been working quite a bit on his '64 Chevy!


LS3 crate motor. No big deal.

Brand new crate small block.  Just another Saturday at the shop.


Some more supplies arrived, and I continued work on my fuel filler neck guard.


I still need to trim the edges and finish weld the flange onto the tank cradle, but this is pretty close to finished.  It's all 16ga steel and protects the filler neck (and vent hoses) from anything that may be thrown off of the tire.  Including a tire itself... With this guard in place, a blown tire is less likely to result in a Hollywood style explosion.

I've been spending a considerable amount of time researching upholstery shops, gathering parts, and visiting shops.  This isn't very easy to express in photos, but here are two!

Portage Trim in Ravenna, Ohio is one of the contenders.  I'm not sure if they will get my business or not, but they're in the running.

Sunday, October 19, 2014

I took a quick break from the fuel tank to retrieve a non-sunroof roof from the local junkyard.  I've been planning to swap the roof skin, but I also need to swap all of the supports because they're different in a non-sunroof car.  This donor isn't good enough to use the skin, but I can use all of the supports as well as the foam headliner.

I charged up all of my batteries and packed up a handful of fresh blades.

Fro, Jimmy, and Jason met me at the junkyard to help out.  The hardest part was carrying the roof 1/2 mile back to the truck!

MK2 looks on in fear.


While on the subject of roof skins, I also picked up a few more clamps.  The small ones are Napa brand, I picked them up for cheap on eBay.  The larger ones are Blue Point, purchased brand new from the Snap-on website.  The original manufacturer for both brands is Grip-on in Spain.  These are so much easier to use than the Vise-grip branded clamps.

As I prepare to send my interior out for a full re-trim, I picked up a bunch of new-old-stock plastic parts from the local dealer.  This stuff is all very fragile, I wasn't able to find any used pieces without cracks.  Some were only available in tan, so I will have to paint them, but that's considerably less difficult than repairing cracks... and also painting them.

Back to the fuel tank.  In order to get the filler neck and tank bung perfectly aligned, I machined a plug that fit perfectly into both halves of the Wiggins clamp.  There is also a collar on the spacer to allow for the perfect spacing between the two halves.

I tacked it myself, and test-fit the Wiggins clampshell.

I also cut a small relief into the tank.  The clearance between the subframe and tank was just a little too close for comfort, so I added a small indent.  I tacked it all myself, but delivered everything to Bill Lewis for final welding.

After getting the tank back, I decided to make a steel guard to protect the filler neck.  The tire is VERY close to the aluminum filler neck, so any road debris or a failed tire could turn into a serious problem.  This will make sense in a minute...

The filler neck is 2" tubing, so I bought some 16ga steel 3" diameter tubing to allow for some air gap.  The bend radius of the tubing was a little too wide, so I had to pie cut it and tighten everything up.


Now this should make a little more sense!  I also made up a bolt-on coupler so the guard can bolt into the tank cradle.  I forgot to take some in-progress pictures, but this is the lower half of the filler neck guard.

I still need to trim and weld everything, but this is the general layout.

Sunday, October 5, 2014

We decided to leave H2O a day early, and I used my pre-scheduled vacation day to work on the car.  I went to the junkyard and picked up a set of clean-ish MK3 Jetta Trek seats to use as retrim donors.  These are shaped a little differently than my original seats, and they will be perfect candidates to be recovered in leather.

I also found the rear bench I have been looking for.  Most of the higher-trim models came with a 60/40 split rear bench, with an armrest, and they never look good after being recovered.  I was able to find a solid rear bench which matches the front seats.

My original seats had 1994-only seatbelts.  The lap belt and shoulder strap are separate belts, with two different mechanisms.  I want to keep them, so I decided to swap the new fabric and foam onto my 1994-only seat frames.


I also dug out my dash, center console, and steering wheel.  I took a bunch of pictures and sent them to a few upholstery shops, I need to get moving on my interior.  The plan is to re-trim all of this in black synthetic leather.


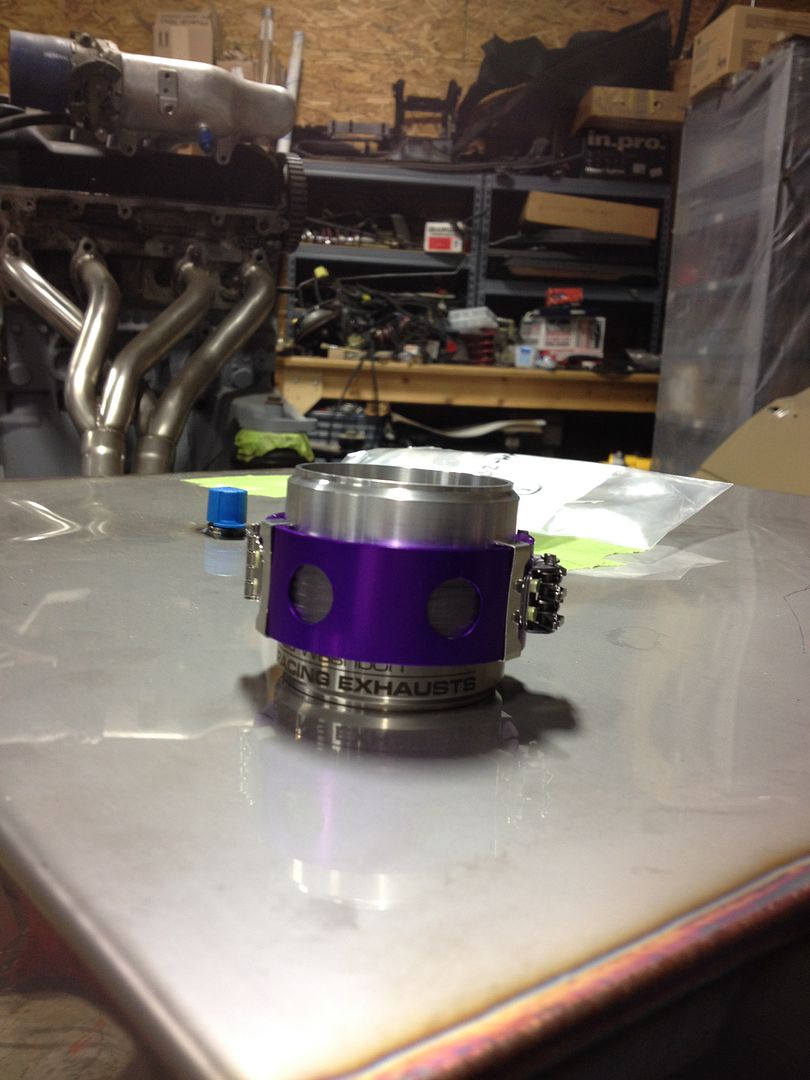
So back to the fuel system.  I received the 2" Wiggins clamp I have been waiting for.  This will couple the fuel filler neck into the new fuel cell.  One side is stainless steel, which will weld into the tank, and the other side is aluminum, which will weld onto the filler neck.

This is what I was previously using - a piece of 2" Tygon tubing clamped onto two custom barb fittings.  It leaked, which is no good!

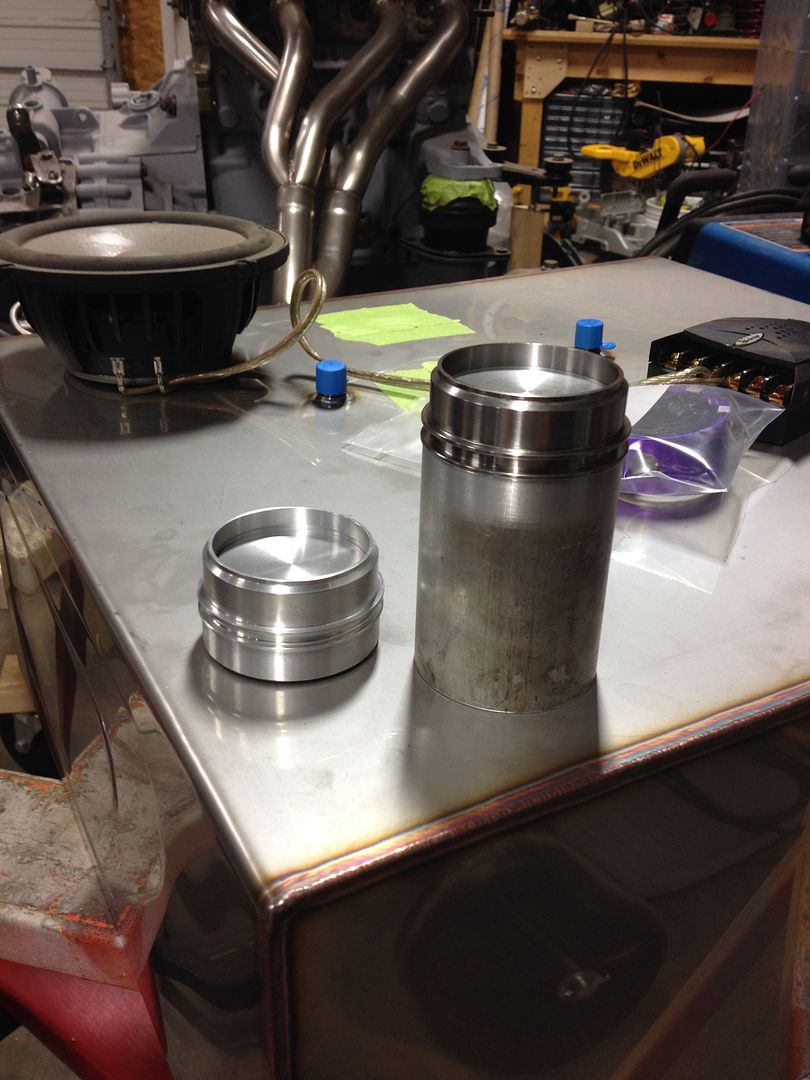
I didn't want the weld ferrules to warp during the weld process, so I machined some tight-fitting round plugs.


I also cleaned up some of the old fittings on the filler neck.  I was previously using some 1/8 NPT barb fittings for the vent hoses, and I'm switching to -6 AN fittings.

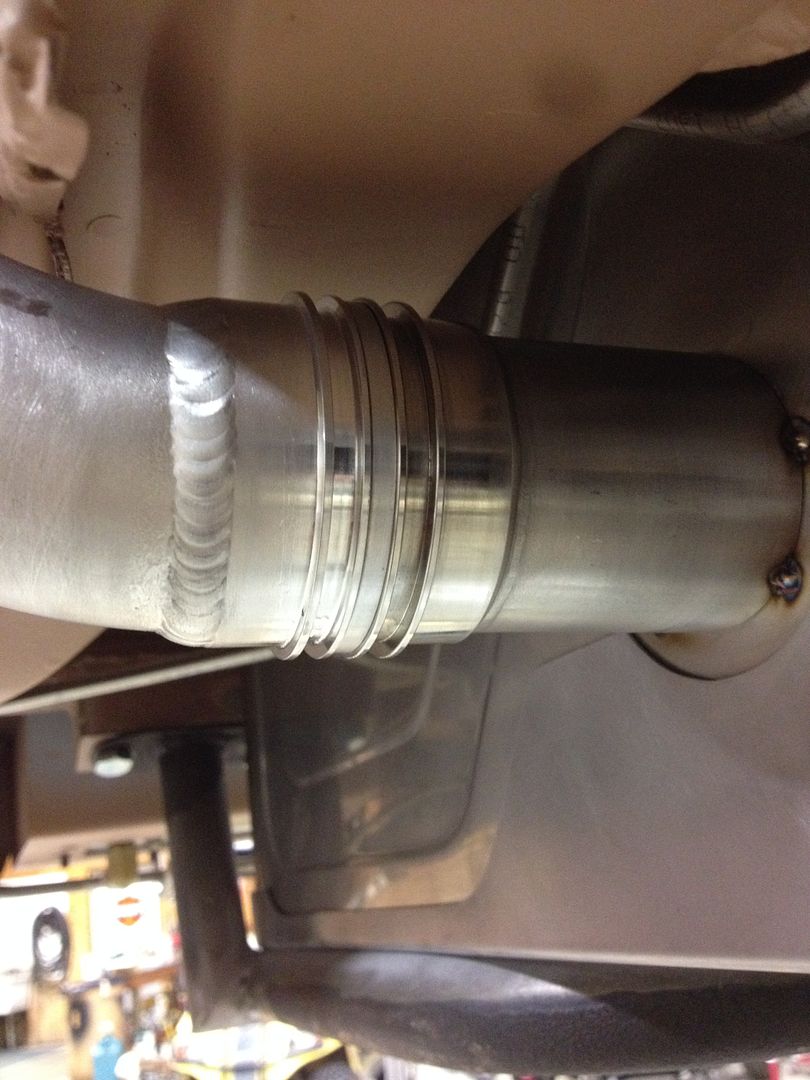
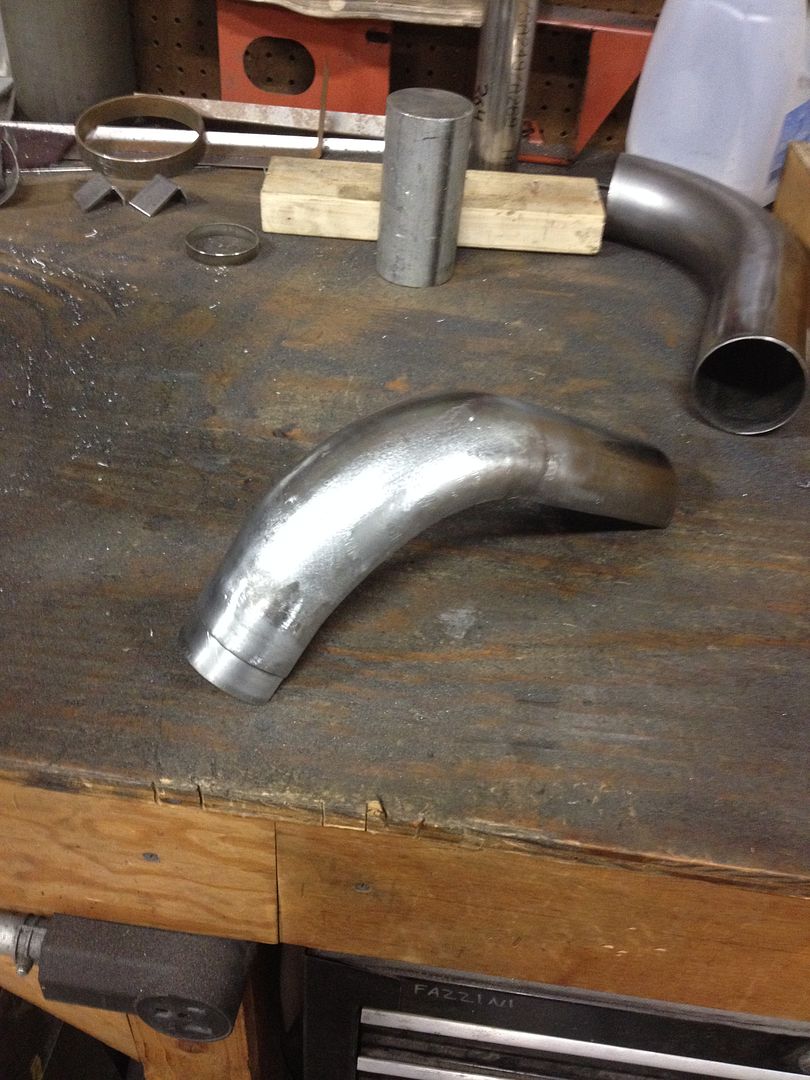
Fast forward a few steps - after a trip to Lewis Welding and some cleaning, the filler neck is done!

He also welded the stainless weld ferrule onto a piece of straight tubing.  I'm going to need 1-2" of straight section before it welds into the tank, which I will fit now that everything is in place.

I have been working like crazy on this car - I'm on a mission to finish for H2O 2015!  Unfortunately, that comes at the expense of taking decent pictures.

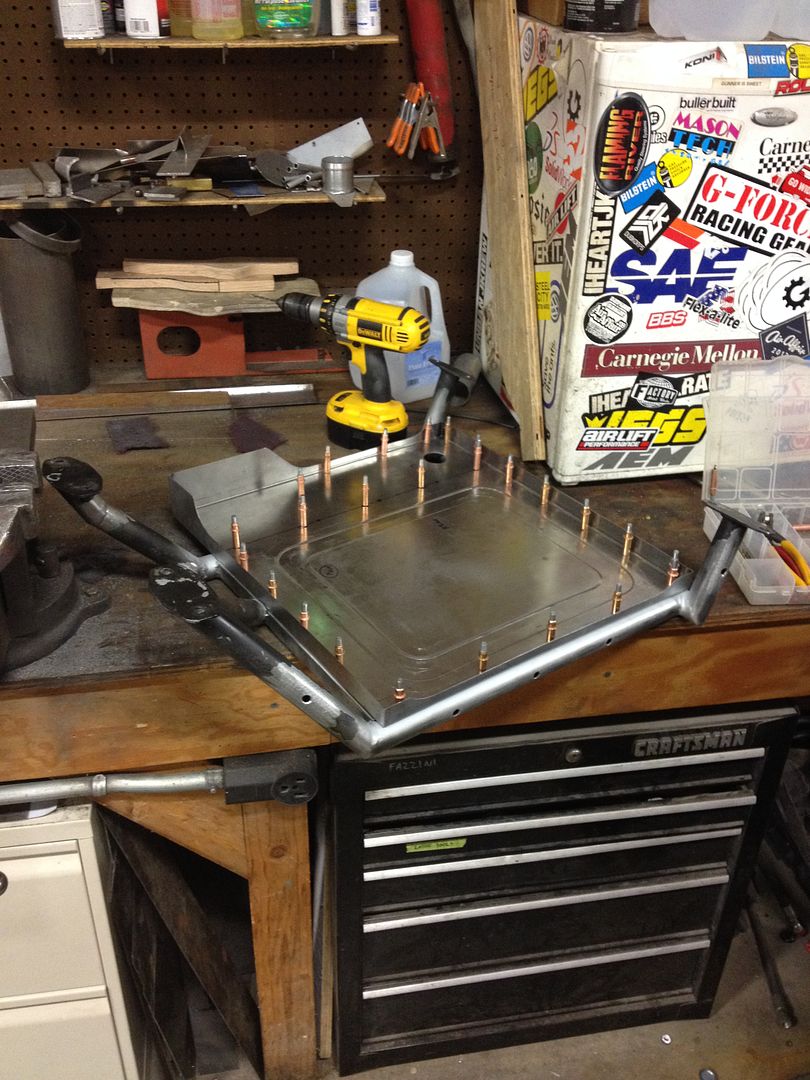
I welded the fuel cell tray onto the frame.

.... fast forward a few more steps, again because I forgot to stop and take photos, but a gigantic mess emerged and the fuel cell straps were also finished!


The passenger side strap cannot be straight across due to some clearance issues with the subframe, so I jogged it a few inches.

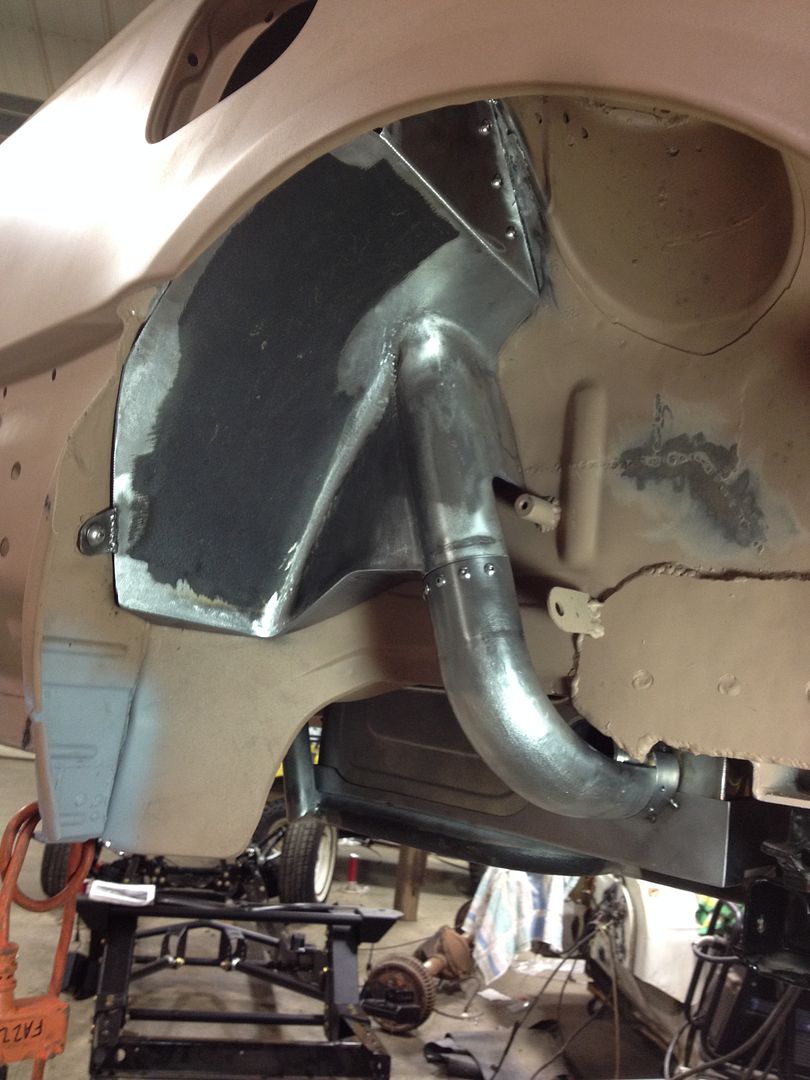
I threw the tank up into the car so I can start fitting the filler neck fitting.


I plan on finishing up the filler neck and fuel system this week!
It has been an extremely busy two weeks for me, so this will be a long update.

I booked a trip to H2O International  a few weeks ago, but had to repair a few things on my Rabbit before the trip.  I replaced the passenger side door lock module and the auxiliary radiator cooling fan.  These German electronics are so reliable!  Replacing the door lock module means removing the exterior door skin, which is a little unnerving but actually not that difficult.


I cruised down to H2O with Fro, and we stayed with our buddy Nunzo and his Lincoln.

This year we stayed on 115th street in a high-rise condo.  The weather was absolutely beautiful!  The view from the room was pretty cool as well.


There were a lot of really nice cars at H2O this year... but I forgot to take pictures of them!  Here are a few that I happened to snag.  This MK3 cabrio was really clean and well built.

There was a lot more wacky non-VW junk cruising around town this year.  The wing on this Miata was not exactly structurally sound.  I think it would fold if it produced any actual downforce.

I went to visit these two cars.  The one on the left is a twin turbo VR6 MK3 Jetta which uses a combination of Audi, BMW, and custom parts to make the beast rear wheel drive.  The car made its debut last year, but wasn't complete.  This year it was complete and running, and took home a well-deserved best of show!  This was, by a large margin, the most well built car at the show.

The car on the right was no joke either - RHD conversion, turbocharged VR6, and a really clean engine bay.

Here are some pictures from the show.

This engine bay was pretty wacky, but clean and well built.

Wrinkle Red!!!

This Jetta was really clean and simple.  I like it.

There were a lot of really nice MK2s.

Here is another shot of the TT RWD VR6 Jetta that took top honors.