Tuesday, January 13, 2015

Tonight I took the Jetta off of my body cart and blocked it up on the ground.  This is approximately at ride height, 1-1/2" from the ground.


The engine and bay look so different from this perspective!  My body cart puts the car about 12-13" higher than it will really sit, which changes the look of everything.

More supplies.  I bought some Lord Fusor 112B to glue the new roof skin in place, some Fusor mixing tips, and a fresh roll of 2' 3M yellow masking tape. I also picked up some new tools - some carbide burrs, M4 and #6-32 taps (along with their respective tap drills) to complete my tap set, a set of Wiha precision screwdrivers to complete my screwdriver drawer, and a few grinding discs.

Down to business.  No turning back now!!  I ground away the spot welds on the factory roof using my Dynafile and a die grinder.  This is much faster than drilling, it only took me about 45 minutes to remove the skin after I got everything in place.

Gone!


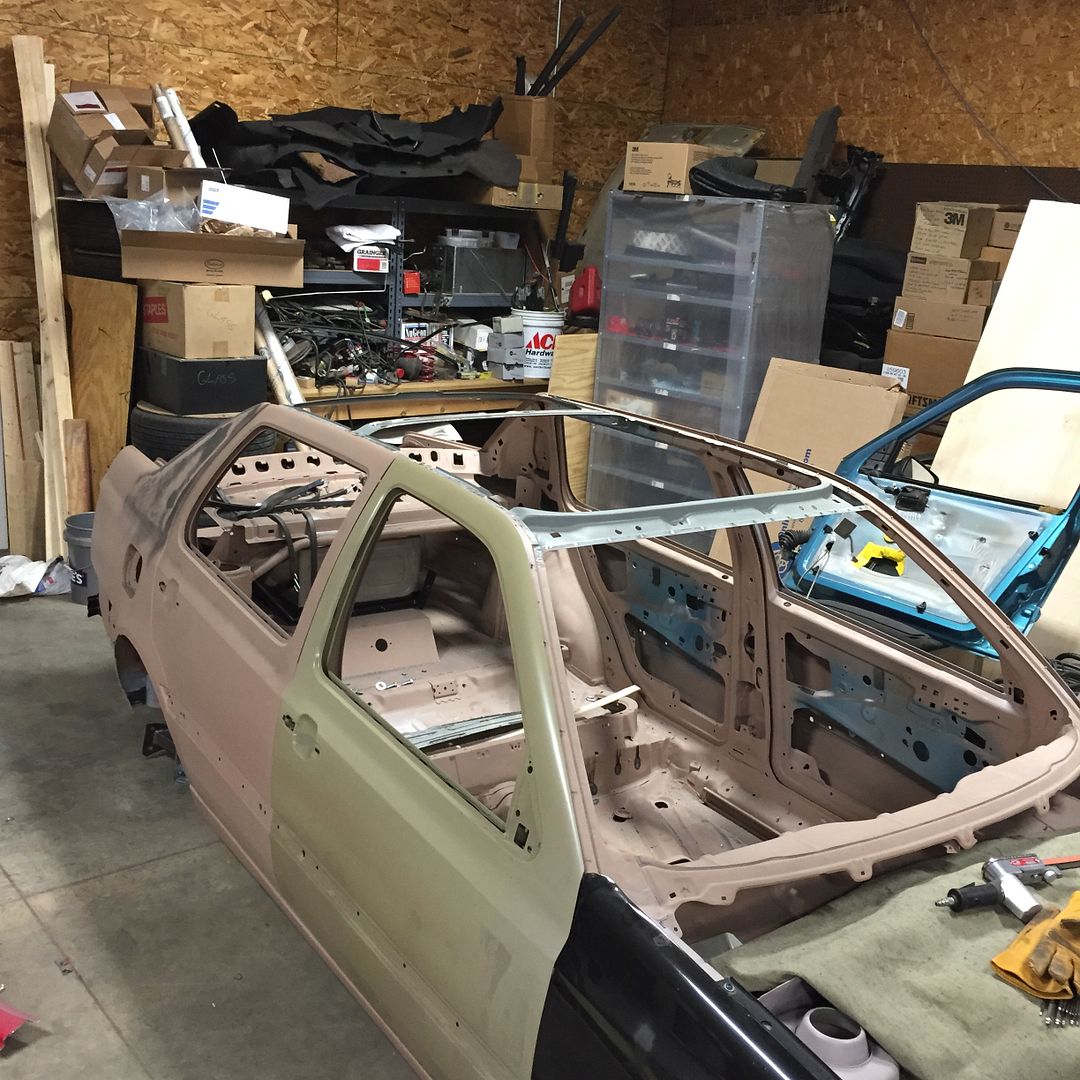
After the skin was removed, I cleaned all of the paint, rust, coating, and seam sealer off of the flanges where the new skin will glue.  The bond line must be completely clean and properly sanded to achieve the best strength, Fusor recommends a bare steel to bare steel bond.  I will save the final sanding for the last minute before I glue it so there is no chance for corrosion in the bond.


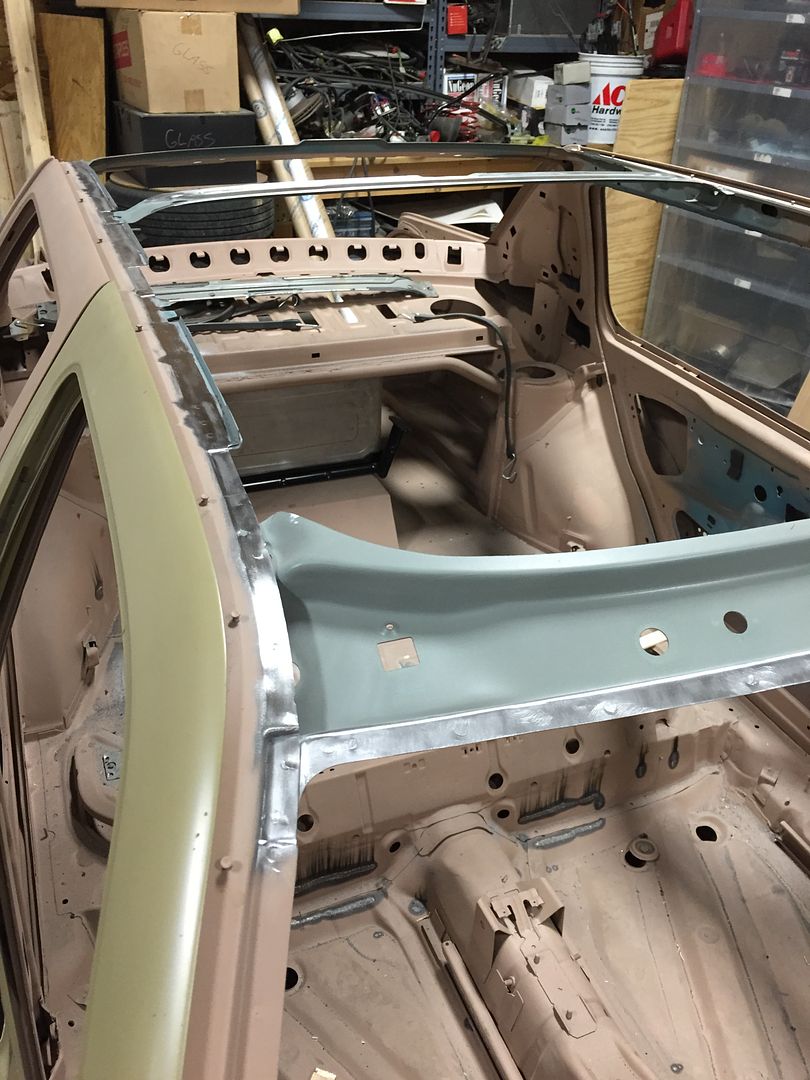
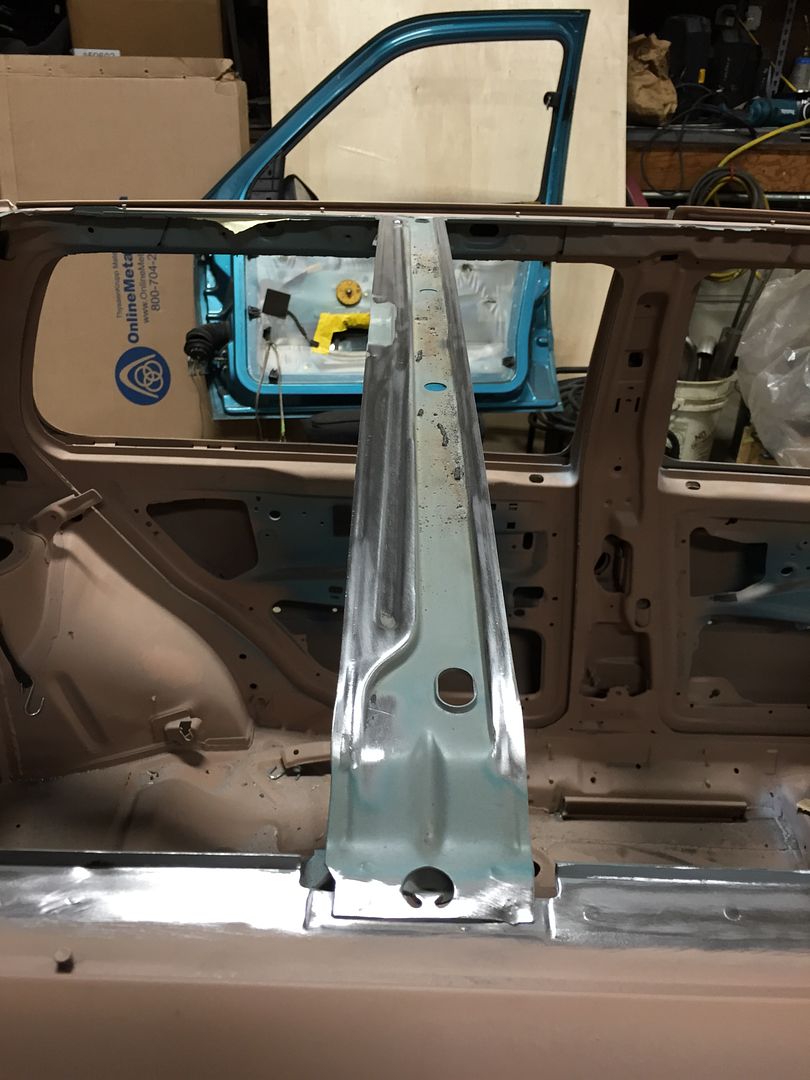
I cleaned off the stock rear crossmember as well.  I'm not sure if I will be using the stock crossmembers, the members from my first donor roof, or the members from the new donor roof.  I cleaned them up anyway, they're easy enough to install and remove.

Sunday, January 11, 2015

I decided that the roof skin I purchased wasn't good enough, so I sourced another one.  I may have been able to fix the first one, and I was looking forward to the metal shaping practice, but I just don't have the time if I want to finish this car for 2015.  

So I bought another one.  I actually made two trips to Patterson Auto Wrecking, which is about 150 miles from my shop, to inspect and then purchase the roof.  This place is a first-class operation - they have all of their inventory online, they were able to email me photos of the car, and the cuts were exactly where I wanted them.  


Loaded up and ready to roll!

Back at the shop, I cut away the remains of the glass and wire-wheeled away the urethane adhesive.


I flipped it over onto my jig/buck and discovered a little surprise - I'm not sure what happened inside this car, but it doesn't look good!  I'm not sure if that is blood or some other brown substance... but I wore gloves and threw everything away.

The entire headliner was covered in spatter.  The car was only lightly hit on the left front, so I don't think it was blood from a wreck. Perhaps a murder?  Maybe somebody shook up their root beer before opening it?  Who knows.  

I started cutting away the structure because I'm only using the skin.  I am grinding or sanding the spot welds instead of drilling them.  This is much faster and it's easier to save the bottom panel.  It does destroy the 'top' panel though, which doesn't matter in my case.

To grind the welds, I'm using either a cut-off wheel in my die grinder or my Dynafile.  This continues to be one of my favorite and most used fabrication tools. 


I even got out the Plasma cutter, which I rarely use, to cut away some of the excess steel before grinding the spot welds.  

And there it is.  Next I have to brace up my Jetta, cut off the old top, and glue on the new one!

Sunday, January 4, 2015

When I left off working on the fuel cell, I finished assembling the fuel pump and couldn't get it to pass a pressure test.  I didn't take detailed pictures, but it failed a 1psi pressure test.  The leak points were all around the threaded studs on both the fuel pump and the level sensor, so I decided to switch to bolts.

This is the original design - studs coming through the fuel cell with nylon washers and nylock #10-24 nuts.

I decided to do a little better.  I removed all of the studs in the Aeromotive fuel cell lock ring.  These were installed with plenty of Loctite, so I had to torch them out.


In addition to swapping the stud/nut combo for bolts, I decided to replace the gasket with a Viton o-ring.  It's hard to beat the reliability of a metal-to-metal bolted joint with a static sealing o-ring.  The gasket groove in the bottom of the Aeromotive fuel pump bulkhead was .100" deep.  I wanted to use a -157 o-ring which is .103±.003" diameter, so I had to cut down the land.  My target was .080", which would provide .020-.026" of crush on the o-ring.

I made this sketchy fixture to hold the part in my lathe.  I welded the tabs onto a piece of 5" diameter pipe, drilled and tapped a few holes, then faced it flat.


Bulkhead bolted in place.  It's hard to see because the lighting isn't very good, but the original groove is visible here.

Masked up.

Fast forward a few steps - I cut the groove down to .080" deep and installed the brown Viton -157 o-ring.

I also replaced the plastic ring, #10-24 studs, and cork gasket on my level sensor with another Viton o-ring seal.  I machined an aluminum mounting ring for inside the tank.

The bottom of the level sensor had a small lip, but it wasn't very flat and definitely not a suitable surface for a reliable o-ring seal.  So I mounted it in my lathe, set up an upside-down face grooving tool, and spun everything in reverse to get a nice groove under the flange.


Under the heads of the bolts, I'm using sealing washers.  These are just plated steel with Buna-N seals, but everything should still be compatible with gasoline.  Viton is a little better, but these aren't too easy to find in stainless/Viton.

Sealed!!  Gas tank = done.

Woody has been making progress on his '72 as well.  He lifted the cab off and blocked the chassis up to ride height to set the carrier bearing position and  measure for the custom two-piece driveshaft.