I'll start with another Fort Pitt Classic Cars project. I was asked to change the direction on this LSx waterpump for a Studebaker pickup they're building. The first step was to remove the stainless steel insert to determine how to modify it.

After coming up with a plan, I talked them into buying a new water pump. The one they delivered was already used, and I was nervous about adding a ton of cost to a questionable pump. Brand new from the dealership!
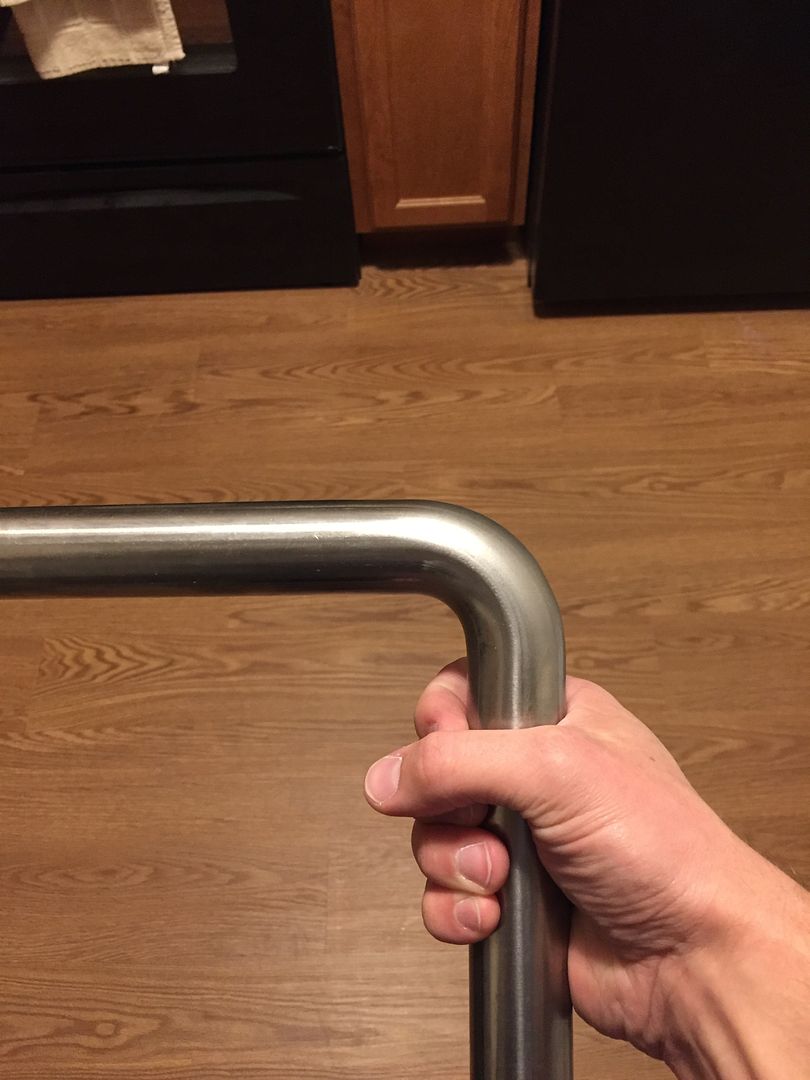
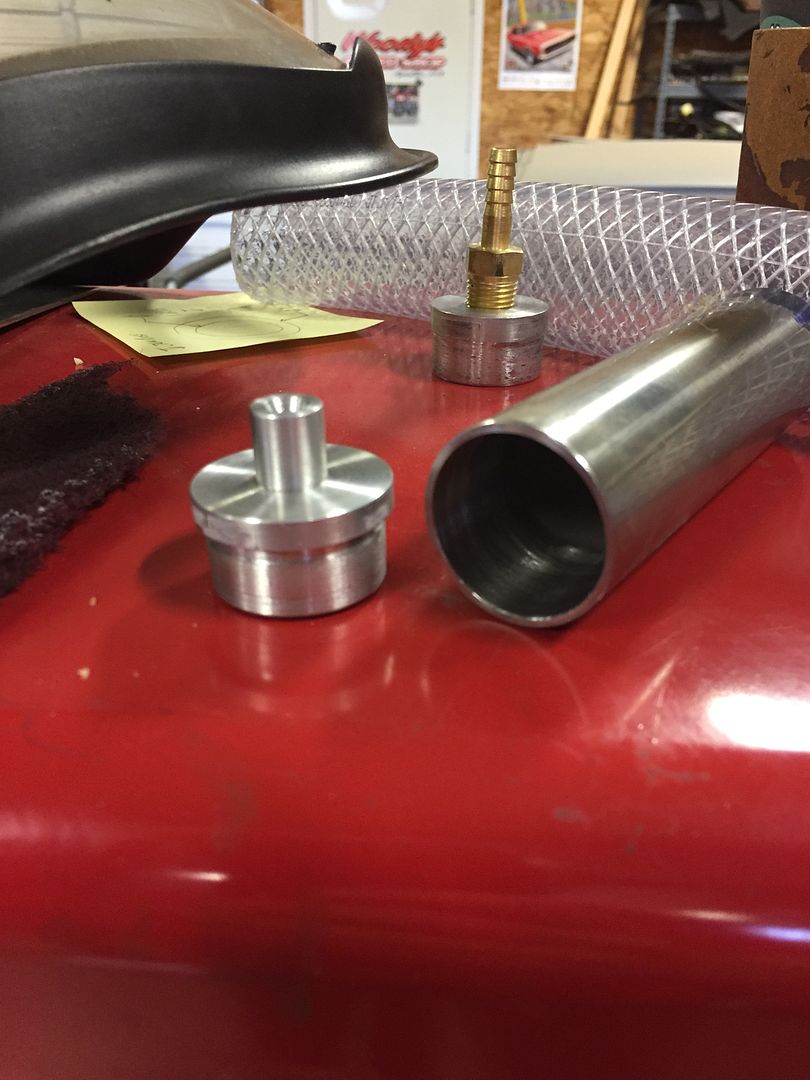
I bought a super tight radius J-bend from Woolf Aircraft. The plan is to remove the factory insert, bore out the housing, then weld this bend to a custom machined insert and press it all together.
The next step was to mask it all up and deliver it to be machined. I outsourced the machining because I don't have the time or facilities to do exactly what I had planned.

...Fast forward a few weeks, and the machined parts came back beautiful!
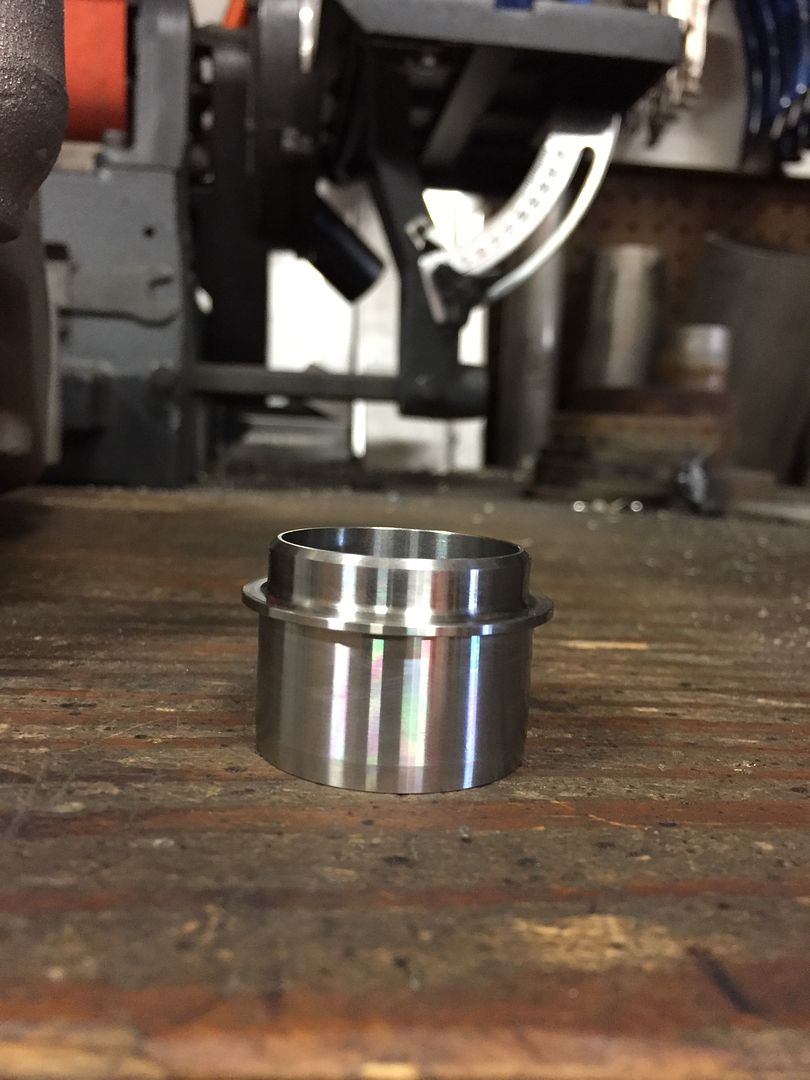
I also added an o-ring gland in the housing for extra sealing.

It's a really tight press fit, so obviously it didn't drop in during the test fit.

The next step was to roll a bead with my Kramer bead former. This was just a test bend, but it made quick work of adding a clean bead in the 0.065" wall stainless steel!

Here it is ready to weld. I turned a tight fitting plug to help keep it round during the weld and hold the back purge fitting.

Filled with argon and ready to TIG up!

Welded!

Bill Lewis welded this one for me. With the back purge, the inside was just as clean as the outside! This is extra important because I planned to grind the weld smooth.
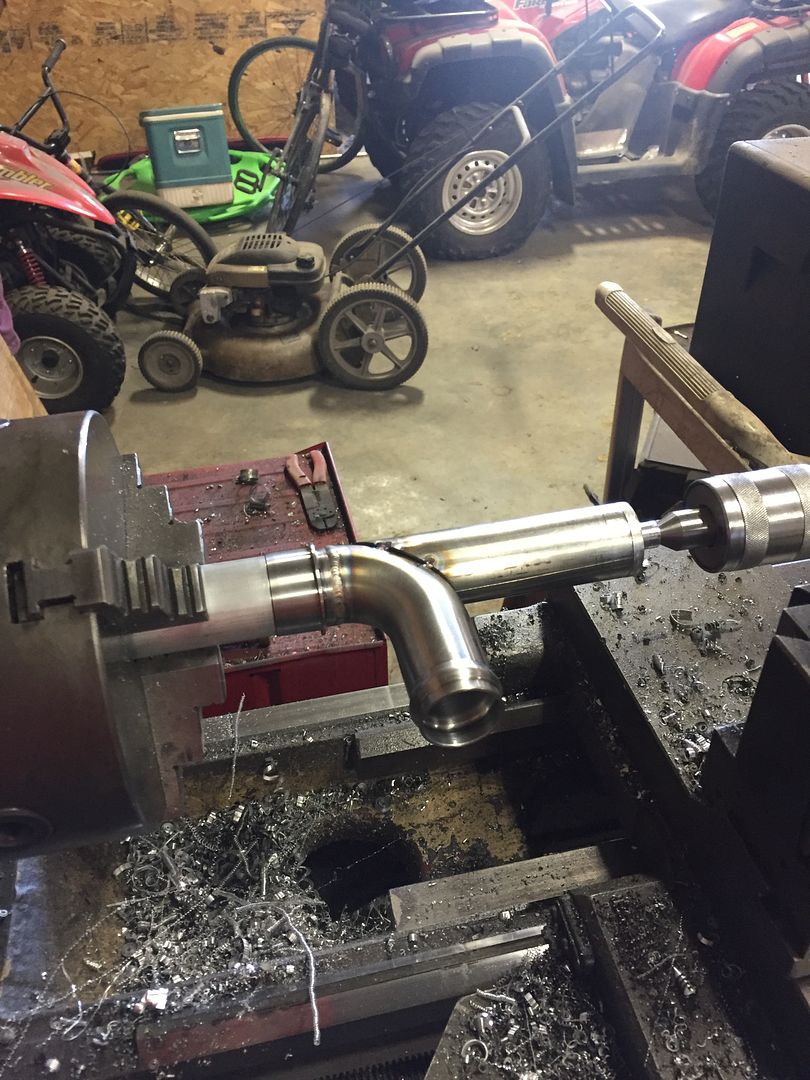
Next I made another plug and miter cut a tube to intersect the angle. In order to press it in, I had to get a perpendicular surface. I also wanted to spin it while sanding the weld off, so this served a dual purpose.
This was the setup in my lathe, ready to sand the weld off.
After grinding the weld flush, I pressure tested it.

Done!

This is the reason for the extra tube - to give me a surface to press against. This was just a test fit to get the press ready since the pressing operation has to be done quickly - before the housing can cool and before the shaft can warm up!

In order to help the press fit operation, I put the part in the freezer for a little while.


The next steps were mega stressful - heat up the housing with a torch while monitoring the temperature to make sure it didn't get too hot, then running to the freezer to get my part, lining it up, and pressing it home! Needless to say grabbing a sexy photo was not a priority!

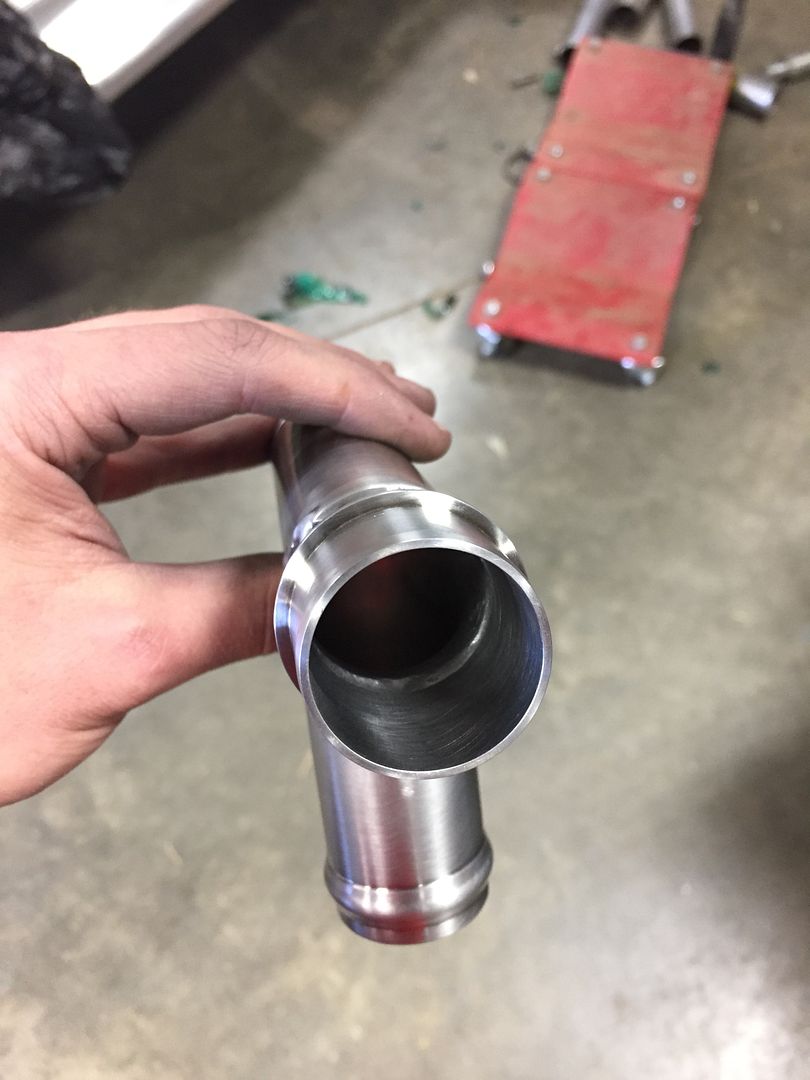
After grinding off my extension and polishing it smooth, here is the result!


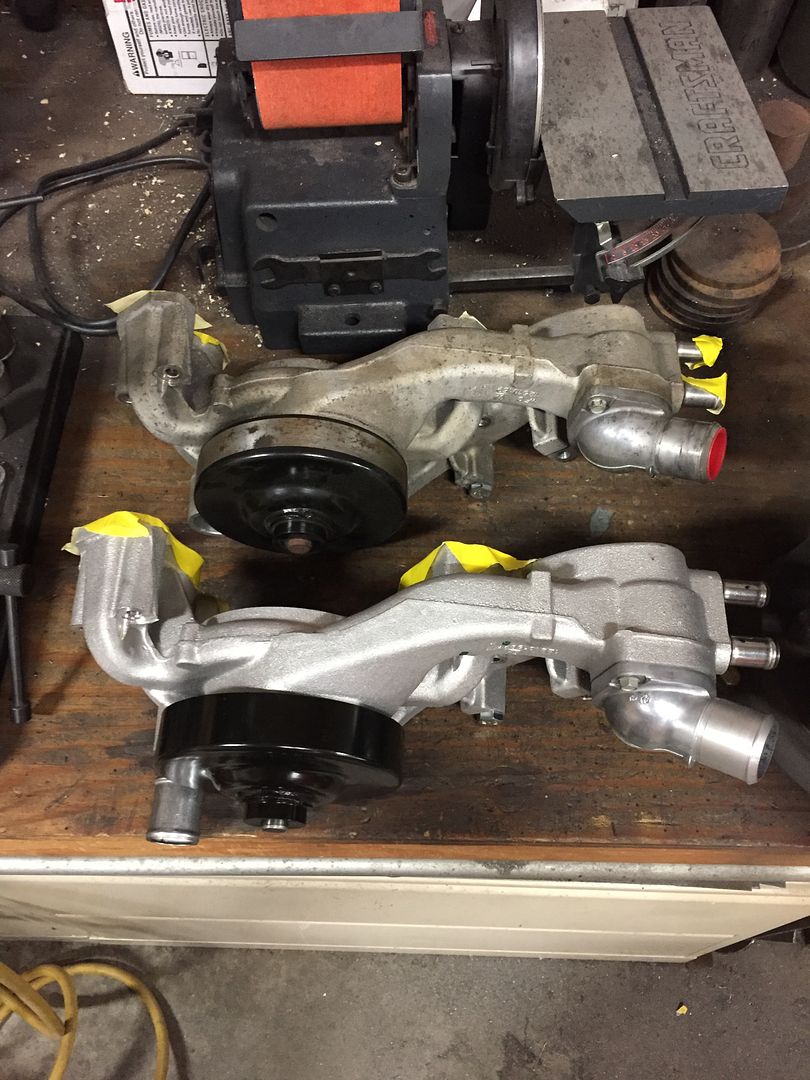
Here is a comparison with a similar LSx pump showing the original and turned tubes.


Nice blog,
ReplyDeleteI love to read this informative blog. This information is very useful for everyone. Thanks for sharing this blog.Buy Pelican lighting distributor Malaysia